Old Article
This content may be out of date or broken, please take care.Sprites are one of the classic web tricks you can use to prevent sequentially loading images and blocking other assets coming into the browser via network requests. This is a short guide on how you can automate the process of stitching images together and generating the CSS you need to display them on the page.
What Are They?
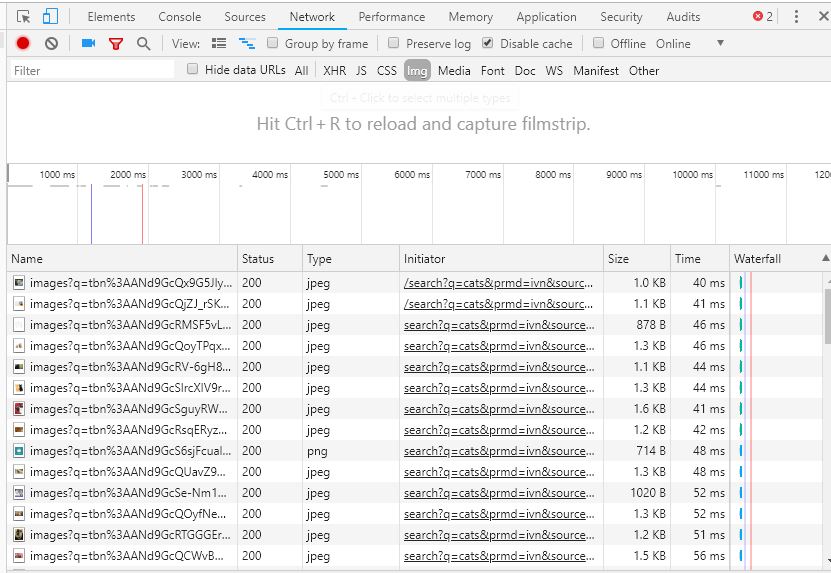
If you're not too sure what a sprite is, here is a brief educational journey. Firstly, what do they solve? You might be familiar with network requests browsers make to pull assets onto the page.

Pressing F12 in Chrome and going to the network tab will show you the above for a site. That's cool and all that but why? Well, the thing is; browsers have a maximum number of connections they can make at any one time. Once that connection limit is reached, everything else is blocked until the asset for that connection has been downloaded and the connection closed.
This is why we use sprites. Say you have 100 icons in an icon set, you're going to find them being loaded onto the page is batches (Chrome is 10 at a time), which isn't great for perceived page speed. Stitching many (small) images into one file is much quicker and more efficient. There is no overhead of finding a domain making a connection and closing 100 times, for example.
The next bit is unstiching the sprite. You can use CSS for this. Imagine looking through a tube a sheet of images. Your vision is obscured to just that view, right? As you move the page around, you can see another image - this is what a sprite does! You can use background-positions for this. I won't go into more detail on the ins and outs, on this. You find more of this out in this CSS tricks article.
SVGs
First things first, if you have icons (or logos), you really want to look at SVGs. If you're not au feit with SVGs, these are what we call vector graphics. You can't use them for a picture of the Mona Lisa, but for simple graphics, they are perfect. An SVG gives the browser instructions on how to draw an image, so whether an image is 1px or 10,000px, the quality is the same. This makes them perfect of high-resolution screens maintaining a crisp clear image. The best part about SVGs is; they are just HTML. Seriously, open an SVG in a browser and inspect it.
Automation
So I spoke about the many benefits of sprites, but I didn't touch on the downsides. That is: maintainability. A good example of this is using a sprite for logos. What happens when you need to add a new logo to that sprite? If you put it in the right place, hopefully, you just have to add some more CSS positioning. Worst case, it throws all your other positions out - not cool!
For those of use using build tools, there are plenty of packages to do this for us! So let's get the to crux of this guide: automating sprites. I use the NPM package SVG-Sprite.
I have a source folder of SVG icons - all separate images.
The package will use your folder names and file names to generate the CSS classes. Here is my gulp:
You can obviously play around with the options. SVGs will tend to come with a lot of metadata or rubbish you don't need. Adobe Illustrator is guilty of this. To clean the SVGs up, I added ImageMin as well. This will spit a sprite, CSS and SCSS into the directory of your choosing. Take a look at what it produces, all the references are done on your behalf.
There is a little trick to this package - especially if you're using build tools for your styles. It comes down to the order you run your scripts. I will run this before my main styles, because I will then reference the output SCSS in my own SCSS.
After this, you will just need to use the references for background positions, and style the icons as required.